Unity UI Extensions
Unity Package Manager (UPM) Installation guide
As of Unity 2019, Unity now recommends using their new Unity Package Manager (UPM) system for the installation of assets and components rather than just importing custom asset packages, this provides several advantages:
- Version control - UPM is versioned and allows easy switching of versions on-demand with no impact to your project
- No corruption of your Asset folder in your solution - As the assets/packages are kept separate from your solution, this means your assets folder won’t get clogged up with everything you’ve added, meaning your project size will be smaller.
- No conflicts when upgrading - We have all had the pain when an asset is updated but doesn’t remove old code/art / etc from the project, usually you delete the old folder (if an asset is useing a folder) before re-importing. UPM does not need to do this.
Getting ready for UPM
If you have previously used the Unity UI Extensions in your project, make sure you delete the old “unity-ui-extensions” asset folder from your project before installing the UPM version.
If you still wish to continue using the older Asset method, this is perfectly fine and you can upgrade as normal using the downloadable packages. Just be sure to delete the old folder first before re-importing.
UPM Installation
Note, this instructions only apply to Unity 2019 and above. For 2018 and below, you will have to continue with the existing Asset import method
The Unity UI Extension project is published in a few places for access via UPM, namely:
- OpenUPM
https://openupm.com/packages/com.unity.uiextensions - NPM
https://www.npmjs.com/package/com.unity.uiextensions
OpenUPM Installation
OpenUPM has become the new standard for deploying UPM packages for Unity, so from the 2.3 (2023) release, we will also be publishing to OpenUPM.
The simplest way to getting started using the core platform package in your project is via OpenUPM. Visit OpenUPM to learn more about it. Once you have the OpenUPM CLI set up use the following command to add the package to your project:
openupm add com.unity.uiextensions
For more details on using OpenUPM CLI, check the docs here.
Alternatively, you can register the OpenUPM source manually in your manifest.json along with the scoped registry for finding it, for more details see the OpenUPM documentation.
NPM INstallation
From the 2019.4 release, the UI Extensions has published its UPM packages to the NPM repository at NPMJS, this allows us to have full tracking history for releases.
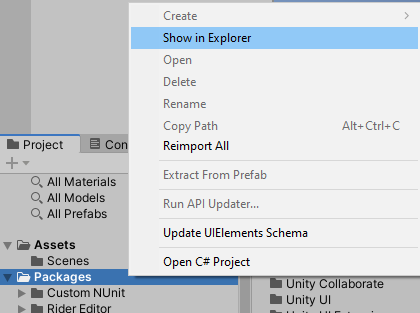
To consume this package source, you simply need to edit your “manifest.json” located in your projects “Packages” folder in the root of your project (not the assets folder). The easiest way to find it is to Right-Click the “Packages” folder in the Project Explorer and select “Show in Explorer”.

Once you open the “Packages” folder, locate the “manifest.json” file and open it in your favourite text editor.
Then you need to add a “ScopedRegistry” and the “com.unity.uiextensions” package to the contents as follows:
  "scopedRegistries": [
    {
      "name": "npmjs",
      "url": "https://registry.npmjs.org/",
      "scopes": [
        "com.unity.uiextensions"
      ]
    }
  ],
  "dependencies": {
    "com.unity.uiextensions": "2.2.4",
If you prefer, you can simply just add the Scoped Registry and then use the Unity Package manager interface to search for and add the package. Note, the version number will change from release to release
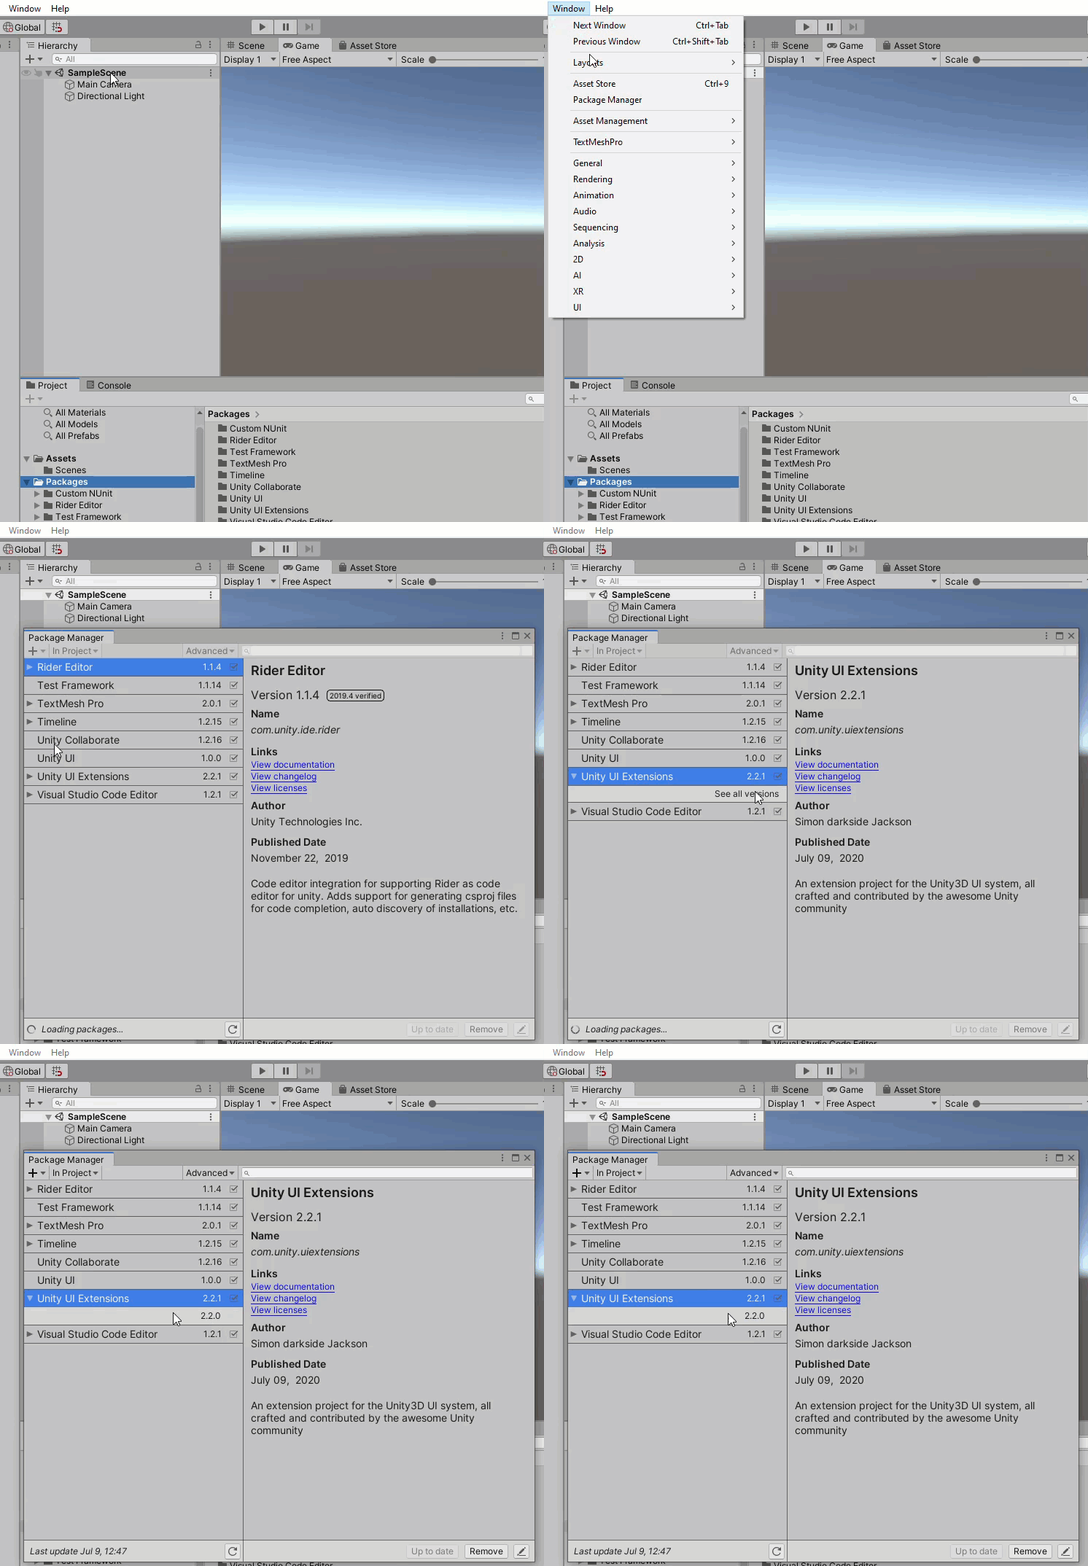
Then when a new release becomes available, simply use the Unity Package Manager interface to upgrade (or downgrade) the version of the UI Extensions project your solution uses.

Development Source
https://github.com/Unity-UI-Extensions/com.unity.uiextensions.git
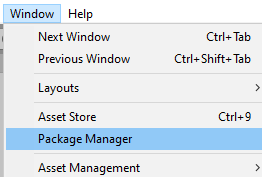
To add the Unity UI Extensions direct from the GitHub source you simply need to register in the Unity Package Manager interface which is accessed via the editor menu (Editor -> Window -> Package Manager)

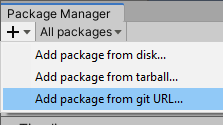
Once Open, you simply need to add the Unity UI Extensions package by Clicking on the + symbol and selecting “Add package from git url…”

Now paste in the GitHub URL https://github.com/Unity-UI-Extensions/com.unity.uiextensions.git in the box that appears and click “Add”. This will automatically install the project into your solution.
Development Builds
To get access to the development source, you simply need to append the selected branch into the Git URL using either the manual or Git Package method as follows:
- https://github.com/Unity-UI-Extensions/com.unity.uiextensions.git#development
This will import the development version instead of the standard release version. We are working on getting preview packages published, but they are not available as yet.
Note in testing, Unity did not import the package using the Git URL method in the package manager initially. but trying a second time with the tag did work? Another path is to add the package as normal, and then update the package manifest manually to add the “#development” tag to switch to the development build.
Examples Installation
From the 2019.4 release, due to the restructuring required by Unity, the Examples for the Unity UI Extension project are now separate. Regardless of what version of Unity you are running, these will remain as a Unity asset to download and install as normal (and then remove when you no longer need them)
If there is a demand in the future, these will be added to a second UPM package so that you can pick and chose which examples to add to your project for reference.
Release 2.3.2 Examples (Current)
UPM users can also now import the Examples direct from the Unity Package Manager in the asset description.
All previous versions of the Unity UI Extensions included the examples within the main project asset, these can all be deleted safely.
Supporting the UI Extensions project
If you wish to further support the Unity UI Extensions project itself, then you can either subsidize your downloads above, or using the links below.
All funds go to support the project, no matter the amount. Donations in code are also extremely welcome
 |
 |
|---|---|
(PayPal account not required and you can remain anonymous if you wish)
You can follow the UI Extensions team for updates and news on:
Twitter / Facebook / YouTube
Also, come chat live with the Unity UI Extensions community on Gitter here
UI Extensions Live Chat
